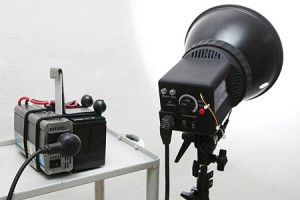
PORTABLE FLASH CONFIGURATION IS MADE OF TWO ELEMENTS:
- A lightweight flash, preferably not an expensive one – I need to move it around a lot, hence light. There are good chances it will take abuse, hence cheap.
- Independent portable power supply as an alternative to the power grid – Did I mention it was gonna move a lot?
LOW POWER FLASH = AN ADVANTAGE FOR EVENT PHOTOGRAPHERS
Even the weakest available monolights are typically intense enough for event photography that is characterized in using high ISO levels and wider apertures. The weaker flashes draw less power to operate then the mighty ones. The meaning of that is that when searching for a substitute to the AC power grid, one can use a lower capacity battery, saving money and weight.
When building a multi-lights setup, a low price item means you can afford more flashes for lower expenditure. Event photography involves a relatively high amortization and I take that into account. In the price of having one of my expensive professional monolights fixed I can buy a new Impact cheap monolight. It will most likely serve me for long enough to return the very small investment many times.
WALL OUTLET OPERATION – OK FOR THE STUDIO, NUISANCE FOR EVENT PHOTOGRAPHERS.
The biggest drawback of using monolights is the wiring issue. Anyone that has experienced using flashes in an event venues knows what I’m talking about. You get to the venue, choose your preferred spots to place your lights and then start to run around the place to find the nearest outlet. It’s always too far. Murphy`s laws… Then you start to stretch long electric cords, and extenders, and then you rush to secure them to the floor with gaffer tape so that no one accidentally trips over them. Sometimes you need to argue with the venue manager, other times you experience electric interferences caused by the dance floor lighting… No fun…
And we haven’t yet spoken about time and portability. Heck, we’re photographers, not roadies, all this thing with the electric cords is annoying and time consuming. Not to mention the fact that on many occasions, the mingling takes place in hall A, the ceremony in hall B and the dinner and dances in hall C.
Now let’s see you remove those gaffers, release and gather your cords and re-mount them in the next hall within minutes… there goes flexibility and creativity…
OK… I have slandered the use of power grid enough… the libel suit from the electric company is probably on the way now… let’s move on …
THE ALTERNATIVE TO THE POWER GRID: BATTERY PACK
While there are many dedicated battery power packs available to buy, most are typically very expensive. Let’s takeQuantum for instance. They make the best battery packs I know, but the average price for a single unit is much more expensive then the Impact monolight I wanted to power. That made no sense because what I was trying to do in the first place was come up with a cheap portable setup that I can afford to duplicate several times at a reasonable cost.
I knew there had to be a solution that is much cheaper. The basic principle was clear; to create a portable, battery operated, 220/110 VAC power supply (depending on your location), strong enough to operate my flashes, yet inexpensive and portable.
A BATTERY PACK ONLY NEEDS TWO ELEMENTS:
- 12V battery
- Power inverter that turns 12VDC into 220VAC (or 110VAC depending on your equipment).
THE BATTERY
I chose to use a 7AH Sealed lead Acid battery (aka SLA battery) that is also the type they use for most battery packs. These batteries are available over the internet and in shops that sell electric supplies. It’s rather cheap; the 7 Amps batteries I use costless than $20 each.
Those batteries are available in various sizes and capacities so you can build yourself small packs as well as monster ones with only few bucks difference, but take my advice, don’t buy a battery that’s way over your needs if you want to maintain the advantage of portability and low price. My experience with the Impact on events has taught me that a 7AH allows me to operate it over a whole evening on which I shoot around 800 photos with the flash on minimum power setting.
THE INVERTER
I chose the type that is sold for camping, that inverts 12V (typically coming from the car’s battery) into 110V/220V AC we need for our flash. Inverters vary from another in wattage and in wave form output. Those inverters can be bought for as low as $20-30 on Amazon and I have a positive experience with them. They are built in metal fan cooled boxes, which is essential for battery pack applications.
Happily, I found out that my flash operates smoothly on “modified sine wave” (square wave) that’s produced by the more common, inexpensive inverters. Some electric appliances require “true sine wave” to operate that is only produced by much more expensive inverters.
I used a 500 Watts inverter for my battery pack. The reason I chose a 500W inverter for the task of charging a 100ws monolight is that flashes typically draw a large amount of power when charging. I wouldn’t want the Inverter to work too hard (or too slow) to provide a fast recycle for my flash over a series of hundreds of fires, so I figured I’d better choose one that is not just strong enough, but also stronger then my needs.
<open geek window>The first time I tried that setup was a few years ago before I purchased the Impact and other weak flashes. When I attempted to operate one of my good old 800ws monolight with a 1000watts inverter, the inverter would not even charge the monolight for a single shot and turned itself off immediately. So if you’re planning to use this compact inexpensive setup for a mighty flash – think again. Chances are that the inverter will shut itself off. As a side note, that is a nice feature most inverters include; they shut off when power drops below a certain minimum, and when load is too high. It makes them safer to use, and it also means it’s hard to fry them if for some reason you plug your Broncolor Miniplus c200 1500 watts monolight in…(DO NOT!).</geek>
INTEGRATION (SIMPLER THAN YOU THINK)
Putting the pack together is simple and easy to perform. You need the battery, the inverter and thick, strong, low resistance wires. You connect the inverter to the battery, making sure polarity is as should be and that’s all. You should also think about the way you’re going to connect your charger to your battery.
MY IMPLEMENTATION
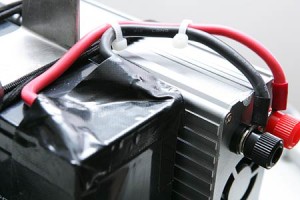
I chose to solder the wires to the battery for a constant, durable connection and then covered the terminals with gaffer tape to avoid short circuits.
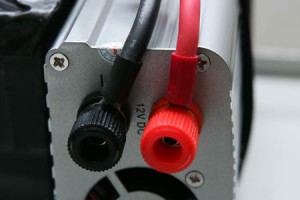
I used heavy duty ring tubular terminals (electric supply store) to perform the connection to the inverter terminals. I did the same for my charger, so I can connect it to my battery even when it’s connected to the turned off inverter by threading the chargers terminals together with the battery ones.
C’est tout! The battery pack is ready to rock your flash.
IS THAT REALLY ALL?
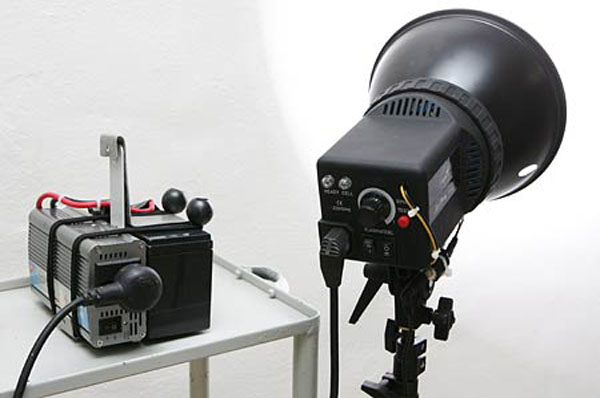
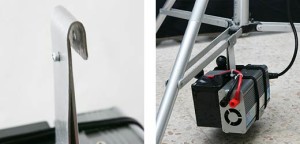
Almost, I mean electric-wise the battery pack is complete but you should also figure how to attach it to your light stand. There is no single right way of doing that. You can come up with whatever setup you want. I came up with the simple carriage you see in the photos, combining the battery and the inverter together. At first I thought of keeping them apart from one another for insulating the heat, but then I realized that the fan cooled inverter stays cool throughout the event and can be fastened to the battery safely. The carriage is made of a bent aluminum bar, with a “cloth hanger” that quickly hangs on the base of the light stand.
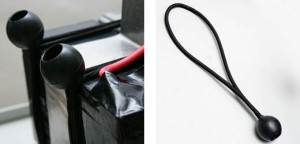
Placing the battery pack at the bottom of the stand also adds weight and stability to the stand doubling as a light stand. Securing of the battery and inverter to the carriage is done with two Bungee balls; a very useful item. I always carry a bunch of those in my bag.
PERFORMANCE
When I use the Impact monolight on low output (my typical setting inside a wedding venue or outside after sunset) the 7 amps battery lasts several hours, and about 800 pops. That is usually enough to last the whole event without changing batteries.
For reference, I use the flash bounced of an umbrella with a typical ISO range of 800-1600 and apertures ~ 2.8-6.3.
Overall I’m very satisfied with the performance and reliability of the pack. It does the job smoothly and the flash charges as fast as when connected to the outlet, over thousands of shots. Since I started using it for event photography, I can move my lights freely across the venue and be more creative with my setups; priceless for group photos, terrific for areal fill light.
CONCLUSION
The DIY car-inverter-based power pack is an awesome DIY for event photographers looking for a cheap alternative to the expensive brand-named battery power packs to operate low power monolights.
Next time you go camping be sure to take your DIY power pack with you. You won’t believe how useful and cool this item is

